First article in a series “OpenLDAP tutorial”.The presentation is done step by step by showing all the details necessary for the final operation. The exposed installation has a minimum configuration for correct operation. Other articles will follow to improve the installation on different aspects. It is advisable to follow this series of posts in order:
- This article, installation and basic configuration.
- Modify the default settings
- Enable the production of Openldap Log file
- Remotly configuration management by the administrator
- Organization and data types
- Adding data to the directory
- Using OpenLDAP to protect access to a website
- OpenLDAP password policy – Managing users accounts
OpenLDAP tutorial, step 1: Properly configure the host Debian / Ubuntu
The server installation procedure systematically sets up a database. The DIT (like an instance in relational databases) is selected based on the domain name of the host machine.hostname -fThis command returns the full qualified name of the machine. Example: desktop.meddeb.net. In this case the database will have as DIT: dc=meddeb,dc=net (the right part of the name from the 1st dot met). If the configuration does not suit you, it should be modified (files /etc/hostname and /etc/hosts).
OpenLDAP tutorial, step 2: Install the OpenLDAP server on Debian / Ubuntu
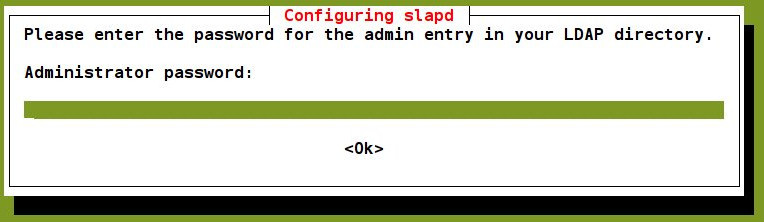
sudo apt-get purge slapd
sudo apt-get install slapd
The installation process will start and request the password of the server administrator.
 In addition to the executable binary files, it is installed the files in folders:
- /usr/lib/ldap/ : OpenLDAP overlay libraries, binary native files.
- /etc/ldap/schema/ : OpenLDAP schemas availables, text files.
- /etc/ldap/slap.d/ : Dynamic configuration, text files.
- /var/lib/ldap/ : Installed database files.
- /var/run/slapd/ : Run settings, text files.
OpenLDAP tutorial, step 3: Install the OpenLDAP client utilities
sudo apt-get install ldap-utilsThis installs the Openldap client utilities , including the ldapsearch query tool. The configuration file of those tools, /etc/ldap/ldap.conf, may be very useful. It allows to set defaults queries parameters. This simplifies the interaction with the server. a typical contents of this file is:
BASE   dc=meddeb,dc=net
URI    ldap://localhost
SIZELIMIT      12
TIMELIMIT      15
DEREF          never
# TLS certificates (needed for GnuTLS)
TLS_CACERT      /etc/ssl/certs/ca-certificates.crt
OpenLDAP tutorial, step 4: Check the installation.
slapd -V ↵
@(#) $OpenLDAP: slapd  (Ubuntu) (Mar 17 2014 21:20:08) $
        buildd@aatxe:/build/buildd/openldap-2.4.31/debian/build/servers/slap
In this sample, the installed server version is 2.4.31
ldapsearch -Y external  -H ldapi:/// -b cn=config "(objectClass=olcGlobal)" -LLL ↵
SASL/EXTERNAL authentication started
SASL username: gidNumber=0+uidNumber=0,cn=peercred,cn=external,cn=auth
SASL SSF: 0
dn: cn=config
objectClass: olcGlobal
cn: config
olcArgsFile: /var/run/slapd/slapd.args
olcLogLevel: none
olcPidFile: /var/run/slapd/slapd.pid
olcToolThreads: 1
This gives the global part of the configuration. This is a default setting. Notice the runtime parameters folder: /var/run/slapd/. Notice, also, the olcLogLevel parameter set to none. This value must be modified for better operation.
sudo ldapsearch -Y external  -H ldapi:/// -b dc=meddeb,dc=net -LLL ↵

ASL/EXTERNAL authentication started
SASL username: gidNumber=0+uidNumber=0,cn=peercred,cn=external,cn=auth
SASL SSF: 0
dn: dc=meddeb,dc=net
objectClass: top
objectClass: dcObject
objectClass: organization
o: meddeb.net
dc: meddeb

dn: cn=admin,dc=meddeb,dc=net
objectClass: simpleSecurityObject
objectClass: organizationalRole
cn: admin
description: LDAP administrator
This gives the only two entries created by default in the directory:
- dc=meddeb,dc=net, who is the DIT of the directory.
- cn=admin,dc=meddeb,dc=net, who is the administrator of the directory and his password given during installation.